Data loss on your iPhone could be pretty upsetting, especially when you lose something important. I will admit that I often end up deleting some images and files that I would have rather retained on my device or at least backed up somewhere safe. Normally, once a file is deleted from your iDevice, it cannot be recovered. Unfortunately, our smartphones do not have trash bins like computers where the deleted files are saved for a specific period of time before they are permanently deleted. So, does that mean once I lose a file I will not be able to recover it ever?
Well, not really! The good news is there are some capable recovery tools and we are going to take a look at one of them called PhoneRescue.
This tool can recover just about all types of files for you. Keep reading this review to learn more about PhoneRescue Review.
What is PhoneRescue
Designed by iMobie, PhoneRescue helps iPhone and other iOS device users recover the deleted, missing or lost files. PhoneRescue is a versatile tool that can come handy in a wide range of scenarios. This tool is capable of scanning all types of iOS devices and recover the files you can no longer find using other methods. It can also extract backups from iCloud and iTunes to restore the files you have lost. In fact, if your device has crashed for any reason, such as after an update, PhoneRescue will help you fix the issue.
![]()

Please note that PhoneRescue is a computer application and is supported on Mac OS and Windows. It is not a mobile app you can install from Apple’s App Store. In order to use this tool, you need to connect your device to the computer using the USB cable.
WHAT’S GOOD AND WHAT’S NOT
I believe that PhoneRescue is a pretty decent recovery tool for the iOS devices. It is easy to install and even easier to use. But, it does have its own share of drawbacks as well. Let’s take a quick look at its pros and cons.
Pros:
- What I really like about PhoneRescue is the number of recovery mode it offers – 4 in total. If you aren’t able to retrieve the desired data using one mode, you can try another one. This immensely increases the chances of recovering the lost files.
- Since it can retrieve the data from the backup files (iTunes and iCloud), you don’t always need to have the device connected to the computer. That could be pretty useful when your phone is lost or damaged and not working.
- PhoneRescue can recover the files directly to your iDevice. That saves some time. But, you can also have it save the file onto your computer so that you can transfer to the device later.
Cons:
- PhoneRescue is pretty effective but it occasionally it ends up recovering additional files that you had not deleted or probably deleted long time ago and done need them anymore. This is why sometimes it becomes difficult to find the files you really wish to be restored.
- While this tool works great with iTunes backup, I did not find it of much use with iCloud. It does not recover the substantial number of files.
IS IT A SAFE TOOL?
When the subject of safety is broached, there are two questions that must be answered – Is it safe to Install? And is it safe to use?
I am glad to say that PhoneRescue gets a checkmark on both counts. I downloaded the installation file on two computers and scanned it with two different antivirus tools. No viruses or malicious programs were detected. It also did not have any third-party, additional programs bundled with it.
I found this tool completely safe to use as well. I have performed the scanning several times and never ran into any safety issues. PhoneRescue uses the read-only mechanism for recovery and thus does not have any impact on your retrieved files. It also makes sure that the existing data on the device does not get affected.
That said, I would still highly recommend you to back up the existing data on your iDevice before using PhoneRescue. The recovery tools often work fine but sometimes behave erratically and thus may cause damages. After all, it is better to be safe than sorry.
PRICING
PhoneRescue for iOS device is available for Mac OS as well as Windows. You can buy and download it from https://www.imobie.com/phonerescue/download.htm?bb=.
It is available in three variants namely:
- Personal ($49.99) for 1 Computer
- Family ($59.99) for 2 Computers
- Business ($69.99) for 5 computers
It also has a free, unlimited trial version as well, which you can download from the same link. The free version lets you preview the data that it can recover. However, if you actually need to retrieve all the data, you will have to buy one of the above versions. Above is the one-time price you need to pay and you get lifetime updates and support for free.
For the base price of $49.99, PhoneRescue may not be the best value for money for personal use as it gives you the license for only one computer. There are other, more inexpensive options you can explore. However, Family and Business plans are quite competitively priced.
Ease Of Installation And User Experience
I would say PhoneRescue offers a very simple and straightforward installation course. All you need to do is buy the license and download the installation file. You run the installation file and follow the simple onscreen instructions to install the tool on your computer. It hardly takes a few minutes. But, make sure you download the right version for your OS to avoid any hassles.
We all love to get more worth than what we have paid for (at least I do). This is why we love it when a tool like this unpacks lots of features. Yes, PhoneRescue offers tons of features and functions that you can use to good effect. But, the only problem with so many features is that the user interface can easily get cluttered and confusing.
Fortunately, that’s not the case with PhoneRescue. I really like the layout of the tool – neat and uncluttered. The various onscreen elements are quite nicely arranged across the interface. There is plenty of white space that makes sure locating and accessing the features is never difficult. Even if you haven’t used any recovery tool before, you will quickly get around PhoneRescue.
Getting Started And Exploring The Features
Once you have installed the tool, everything thereon should be easy. When you launch the app for the first time, you are presented with the Quick Tips screen. You could read the tips and learn more about how the tool works. If you wish to get started straight away, all you have to do is press the button “I’m Read to Start” (check “Don’t show the tips next time” if you don’t want the Quick Tips interface to appear the next time you launch the tool).
Once you are on the main interface titled, “Select a recovery mode to get started” you can pick from one of the following 4 options:

- Recover from iOS Device
- Recover from iTunes Backup
- Recover from iCloud
- iOS Repair Tools
Let’s review each feature one by one.
-
Recover from iOS Device
This is the recovery mode you can use to recover the files or data you have accidentally deleted recently. PhoneRescue is capable of recovering a wide range of data types. What I truly loved is that it took only a few minutes to scan and recover files from my 32 GB iPhone. The tool was able to recover images, videos, data files and even messages. What’s even more incredible is that it lets me choose the type of data I want to recover using a filter.
To recover from a working iPhone, launch PhoneRescue on your computer and click on the ‘Recover from iOS Device’ icon on the main interface. You will now see ‘Please connect your device’ and a disabled blue arrow button on the bottom of the screen. Once the device is connected to the computer, it will read “Your ‘iPhone’ is connected” and the blue arrow button will get enabled. Click the button and leave the rest to PhoneRescue.
-
Recover from iTunes Backup
This mode comes handy when your device isn’t working or is lost but you have the iTunes backup saved on your computer. It works quite like the backup extractor for iTunes. What I like is that you don’t have to manually locate the backup files. PhoneRescue will list all the available backup files on your computer.
You may say, why use this feature when I can back up directly using iTunes? Well, I find this better than Apple’s native process for two reasons. First, PhoneRescue does not wipe out all the existing data on the device. Second, it allows selective recovery; I can preview the backup data and choose what I want to recover and what I can leave behind.
Using this feature is easy too. Select ‘Recover from iTunes Backup’ on the home screen and click the blue arrow button on the bottom left corner. As aforementioned, PhoneRescue will automatically find all the available iTunes backup files.
Choose the file from which you wish to recover the data and click on the blue arrow again. You will now see a properly categorized list of backup data. You can select the data you wish to recover and unselect that you don’t.
-
Recover from iCloud

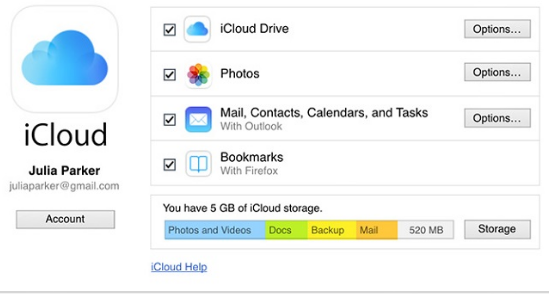
I wish iCloud recovery was as great as the iTunes recovery. Unfortunately, it is not. Even after several attempts, it could not recover more than one fifth of the files as the iTunes recovery. I must say I was disappointed. I could see no reason why they added this option. Probably it increases their marketing potential.
Select Recover from iCloud on the home screen and press the blue button on the bottom right. On the subsequent screen, you need to enter your Apple ID and Password. PhoneRescue does not save your password (as the developers claim).
The tool will list all the backup files from multiple devices (if you have). Select the backup for your device and click on the blue arrow button again. All the files PhoneRescue can recover will be listed on the next screen.
-
iOS Repair Tools
This is the only mode which is not used for the recovery of the lost or deleted data. As the name suggests, it is designed to fix device related issues. This mode can help you when your device is stuck on the black screen or Apple logo; when the problem with software update has caused the device to crash; when your iPhone is stuck in the recovery mode; or when it is caught up in the restart loop. Not a lot of data recovery tools for iOS devices offer repair utility. This is why PhoneRescue is more versatile and useful than the most others.
PhoneRescue Review- VERDICT
After having tried all the recovery modes several times, I conclude that PhoneRescue is a pretty decent recovery tool for iOS devices. It is capable of recovering a huge number of files from a working iDevice or a saved iTunes backup file. Sometimes it retrieves thousands of files, which could make it difficult for you to select what you really want to be recovered. But, it categorizes the files by type to make things easier. PhoneRescue isn’t really good at recovering files from iCloud backup. It retrieves only a handful of files and not necessarily the ones you want. I will also add that PhoneRescue makes up for in ‘iOS Repair Tools’ what it loses in iCloud Backup.


